GUEST BLOGGER POST: This post was written by Mindy Brown, The Off Grid Barefoot Girl. I love the way she makes it so simple to get great soil going in your your garden!
A worm tunnel planted in the garden can help dramatically improve your garden soil. It is a bucket with holes in the sides for worm entry that is planted in the garden for worms to crawl in and out of and feed on the organic matter inside the bucket.
It is basically the same concept as vermiculture and in-garden composting all in one. When the worms crawl in and out, they help provide organic matter to the garden soil by processing matter in the soil into nutrient rich worm poo.

Benefits of Installing A Worm Tunnel in Your Garden
When you install a worm tunnel in your garden, you are helping your garden soil improve with added nutrients from the constant worm activity of them slowly spreading their worm castings around in the soil. As the worms wiggle around in the dirt, it helps aerate the soil and bring oxygen to the roots of plants.
After a few weeks, you can find dark organic compost at the bottom of the worm tunnel to use and spread throughout the garden. You can do this over and over again by refilling your worm tunnel with more organic matter for the worms to break them down and turn into rich compost and worm castings (a gardener’s gold!). This makes compost much faster with the help of the worms and it is a smaller pile to work with!
- Added nutrients from worm activity.
- Aerate the soil with worms wiggling around in the soil.
- You end up with rich dark organic compost and nutrient dense worm castings for your garden!
Keep reading to learn more about installing a worm tunnel in your garden to improve your garden soil.
Worm Tunnel Materials:
- A five-gallon/20 litre bucket (as many as you want for your worm tunnels).
- A five-gallon/20 litre bucket lid.
- A power drill.
- A lawn ornament (optional, but fun!)

A five-gallon/20 litre bucket works great for this worm tunnel project. A five-gallon/20 litre bucket only takes up one square foot of garden space in the garden. I like to place a few of these worm tunnels in various areas of my garden to help improve my garden soil all season long.
You don’t need to buy a new bucket, try asking your local café or garden centre if they have any left over buckets you can have for free.
Start by drilling holes in the sides of your bucket. I ended up digging back up my buckets to make the holes bigger than what I started with in this photo. I found that slightly larger holes work better for the worms to work their way in and out of the bucket, so keep that in mind when drilling your holes.

Start by digging a hole large enough to bury the bucket almost to the rim. Leaving the bucket rims exposed helped prevent the bucket from drowning with the rain or sprinkler system. You want the inside contents of the bucket to be sponge-wet, not soaked. You do not want to drown the worms!

Once the hole is dug, place the bucket and bury it almost to the rim, leaving a few inches above the ground to prevent flooding.
Do not fill it with dirt since you will be filling it with organic matter compost-style.

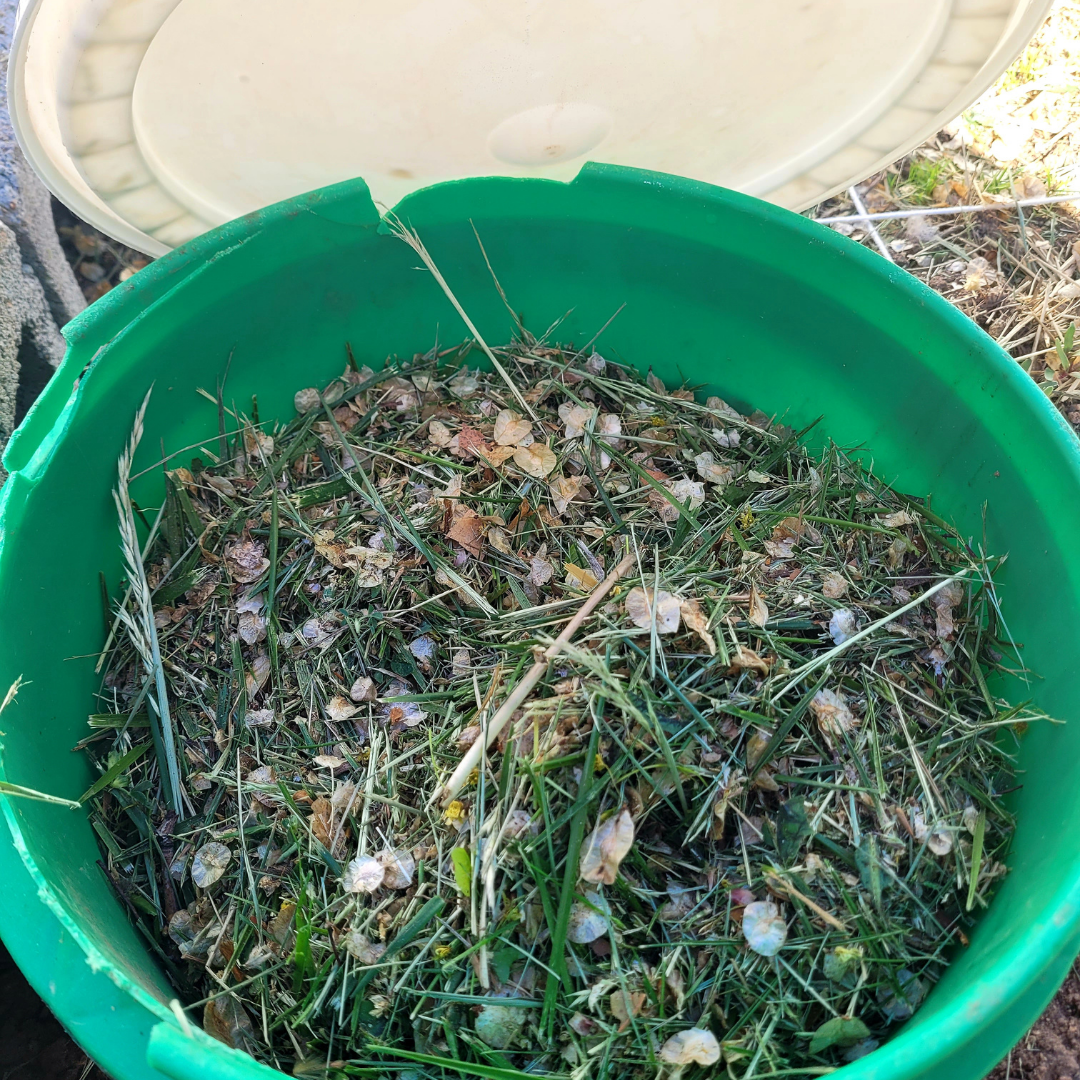
Begin filling the bucket with organic matter like a compost pile or a worm bin. Fill it with garden clippings, grass, food scraps, water, eggshells, and anything else that you would normally put in a compost pile or worm bin.
What to Add to Your Worm Tunnel:
- Garden clippings, like grass and weeds
- Food scraps
- Eggshells
- Used coffee grounds
- Water (enough to keep the pile damp)
- Cardboard shreds (without ink and glossy prints or tape)
- Hay or straw
- Fallen leaves from deciduous trees
- A cardboard topping or worm bin cover. Some like these have handles and fit into a bucket perfectly!
- Any other organic matter you could add to a compost pile or worm bin.

There are also some things not to put in your worm tunnel. These include large quantities of meat, citrus, onions and dairy foods. Foods that contain preservatives will generally not be consumed by the worms so avoid those too. While they won’t harm the worms, they won’t get eaten and will simply rot in the bin.
Keep the lid on the bucket because worms like to be in dark and moist environments. Since your worm tunnel will be a buried bucket with a lid, you can place a fun lawn ornament on top of it for decoration. I placed an adorable raccoon on one of my worm tunnels as you can see in the photos.
Throughout the season, the compost pile contents inside the bucket (now worm tunnel) will break down naturally and with the help of the worms. Keep an eye on the inside contents of the worm tunnel to see when you should empty out its contents throughout the rest of the garden.
You should find a broken-down dark organic matter that has turned into rich compost to spread throughout the garden. You can then begin to refill the worm tunnel to produce more compost for your garden.
You can easily remove the compost from the worm tunnel either with your hands with garden gloves or with a small hand shovel. I like to use a small hand shovel and scoop the gorgeous newly composted organic matter into a smaller bucket and spread it around my plants (they love it!).
You can also add it to a bucket of water or watering can and use it as a foliar spray for your tomatoes and leafy greens.
The best thing about installing a worm tunnel in your garden is having as many worm tunnels as you need for your soil needs. I like to have one worm tunnel per five square feet of garden space. This helps me in ways of not needing a sizeable unsightly compost pile in my yard because I have many worm tunnels buried in different areas of my garden that make compost.
Give this garden project a try. Once installed, it is easy enough to maintain and a fun way to compost, especially if you hate the idea of having an unsightly compost pile in your yard! We would love to hear about your project so if you try this out, leave your success and tips you may have found helpful in the comment section!

Interested in Guest posting? Apply here: https://simplehomestdg.wpengine.com/guest-posting/